This is the sixth part of a multi-part series that shows how to set up Jupyter Hub for a college class. In this post, we will set up jupyterhub to run as a system service in the background which will allow us to work on the server and run jupyterhub at the same time. Then we will add an authentication system so that users can log into our Jupyter Hub server using github usernames and passwords. Finally we will modify the authentication system so that users can log into our Jupyer Hub server using their google usernames and passwords. The same user name and password a student uses to access their college email.
Posts in this series
- Why Jupyter Hub?
- Create ssh key, save to documents/ssh-keys
- Create a new Digital Ocean Droplet with a non-root sudo user
- Install Jupyter Hub on the server
- Apply SSL, link a domain name to the server and configure nginx
- Connect OAuth to Jupyter Hub (this post)
- Pre-populate each new user's directory tree to include three notebook assignments.
Last time
In the last post, we succeeded in getting jupyterhub to run on https and use SSL certificates. We created SSL certificates, modified the nginx config and modified the jupyterhub config. At the end of it we were able to get a working version of jupyter hub running SSL security.
Steps in this post:
- Run jupterhub as a system service
- Test local OAuth
- Acquire github OAuth credentials
- Modify jupyterhub_config.py to use github OAuth
- Acquire google OAuth credentials
- Modify jupyterhub_config.py to use google OAuth
1. Run jupterhub as a system service
Working off of this wiki
To run jupyterhub as a system service, we need to create a service file in the /etc/systemd/system directory. cd into the directory and have a look around. You should see a couple files that end in .service
$ cd /etc/systemd/system
$ ls
cloud-init.target.wants                network-online.target.wants
dbus-org.freedesktop.thermald.service  paths.target.wants
default.target.wants                   sockets.target.wants
final.target.wants                     sshd.service
getty.target.wants                     sysinit.target.wants
graphical.target.wants                 syslog.service
iscsi.service                          timers.target.wants
multi-user.target.wants
We'll create a new .service file called jupyterhub.service
$ sudo nano jupyterhub.service
In the file, add the following. Note that as part of the PATH environment variable /home/peter/anaconda3/bin is included. This is the path to our Anaconda environment. As part of the ExecStart we include a flag for our jupyterhub_config.py file.
[Unit]
Description=Jupyterhub
After=syslog.target network.target

[Service]
User=root
Environment="PATH=/bin:/usr/local/sbin:/usr/local/bin:/usr/sbin:/usr/bin:/home/peter/anaconda3/bin"
ExecStart=/home/peter/anaconda3/bin/jupyterhub -f /home/peter/jupyterhub_config.py

[Install]
WantedBy=multi-user.target
Save and exit with [Ctrl-c] + [y]. Now we need to reload the system daemon and run jupyterhub as a system process using the command: sudo systemctl <start|stop|status> jupyterhub
$ sudo systemctl daemon-reload
$ sudo systemctl start jupyterhub
We can see if jupyterhub is running with:
$ sudo systemctl status jupyterhub

 Loaded: loaded (/etc/systemd/system/jupyterhub.service;
 Active: active (running)
2. Test local OAuth
Now we can go to the server and log in as our non-root user, and log in as the other user we created kendra.
A couple times I thought that jupyterhub was running after using systemctl start jupyterhub, but the hub wasn't working when I went to the hub's web address. It turned out that jupyterhub wasn't running when I keyed in systemctl status jupyterhub. Most times looking for an error and tracking down the the error worked, but one time it seemed to be a problem with the http-configurable-proxy. The following command will shut down the proxy if you get stuck like I did (insert the number corresponding to the configurable-http-proxy process after the kill command):
$ ps aux | grep configurable-http-proxy
$ kill ####
3. Acquire Github OAuth credentials
A problem now is that if we go to the admin page on jupyter hub, we can't add new users. The users have to be added to the server using PuTTY first and then can be added to jupyterhub with the admin panel. This is OK for a small team or a couple users, but for a college class, creating a new user on the server for each student, then emailing out passwords... Ah! what a mess. So we need to give jupyterhub the authority to create new users from the admin panel and we need a way to have users login with a user name and password they already have.
One of the ways students could log into Jupyter Hub is using their github credentials. This would require each student to have a github account. A github account for each student might be worth it to give students exposure to git and github as a tools. So let's give the github authenticator a whirl. The github authenticator is also pretty well documented for Jupyter Hub, so it's good authenticator to try first.
To use the github authenticator, we need to install oauthenticator. I couldn't find oauthenticator on conda-forge. If it's on conda-forge, I would install it from there rather than PyPI. But for this one, I used pip.
$ pip install conda install oauthenticator
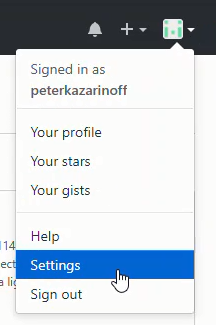
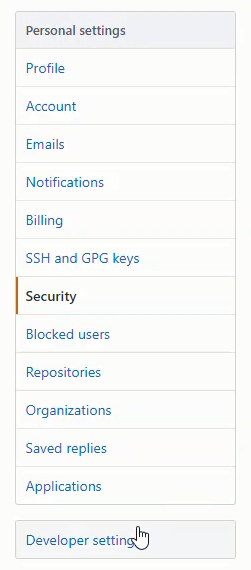
Now we need to log into github and create an OAuth App and copy the Client ID and Client Secret. The short version is:
github profile → settings → Developer Settings → OAuth Apps → Register a new application

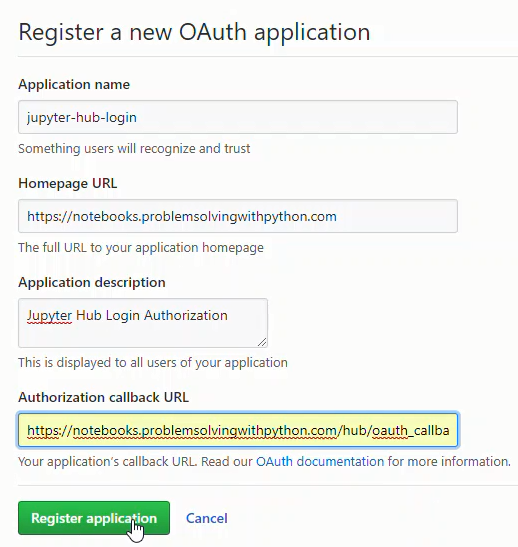
Set the Homepage URL as:
https://notebooks.yourdomain.com/
Set the Authorization call-back URL as:
https://notebooks.yourdomain.com/hub/oauth_callback
in the App Settings page, we need to copy two settings:
- Client ID
- Client Secret
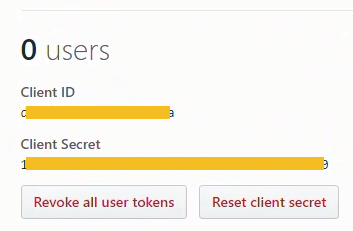
These two long strings will need to be pasted into the jupyterhub_config.py file.
4. Modify jupyterhub_config.py to use github OAuth
Now we'll edit the jupyterhub_config.py file to include a couple additional lines. Note in the configuration below, #c.Authenticator.whitelist is commented out. We want to see if a github user can log onto the server (which will automatically create a new user and spawn a jupyter notebook server) and run notebooks. Once we know the server is working, we can uncomment the white list and only allow in specific github usernames. Note c.LocalGitHubOAuthenticator.client_id and c.LocalGitHubOAuthenticator.client_secret are the long strings from our github OAuth App.
#jupyterhub_config.py

from oauthenticator.github import LocalGitHubOAuthenticator
c.JupyterHub.authenticator_class = LocalGitHubOAuthenticator

c.LocalGitHubOAuthenticator.oauth_callback_url = 'https://notebooks.problemsolvingwithpython.com/hub/oauth_callback'
c.LocalGitHubOAuthenticator.client_id = 'xxxxxxxxxxxxxxxxxxxxxx'
c.LocalGitHubOAuthenticator.client_secret = 'xxxxxxxxxxxxxxxxxxxxxxxxxxxxxxxxxxxxxxx'

c.LocalGitHubOAuthenticator.create_system_users = True
#c.Authenticator.whitelist = {'peter','kendra'}
c.Authenticator.admin_users = {'peter'}
Restart jupyterhub with
$ sudo systemctl stop jupyterhub
$ sudo systemctl start jupyterhub
$ sudo systemctl status jupyterhub
Browse over to the hub's URL and we should be able to log in with a github username and password.

4. Google Authenticator
Now that the github authenticator works, we are going to get into the weeds of getting the google authenticator to work. Why google authenticator instead of github? Our college uses the gmail suite for both staff and students. When students log onto their college email, they are logging into gmail. Students can use google calendar and google drive with their college email account as well. So it is probably best that students log into juypter hub using the same google login that they use to access their college email, google drive and calendar.
First up we need to set up a google OAuth instance. I did this using my personal gmail account rather than my college gmail account. Some parts of google suite are not available in my college profile like youtube and developer tabs.
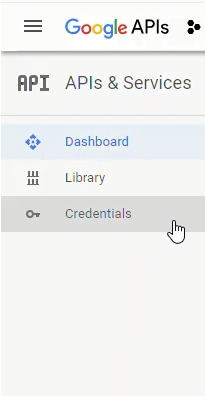
To obtain the google OAuth credentials, we need to log into the google API console https://console.developers.google.com/ and select [Credentials] on the lefthand menu.
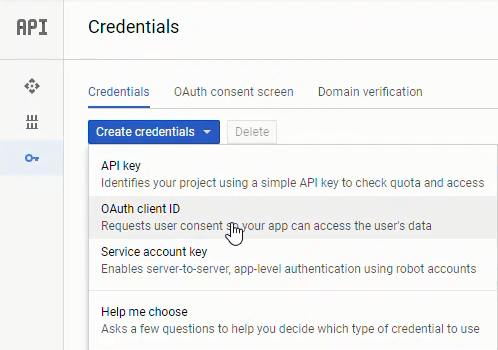
Next we'll create a new OAuth credential under [Credentials] → [Create Credentials] → [OAuth client ID]:
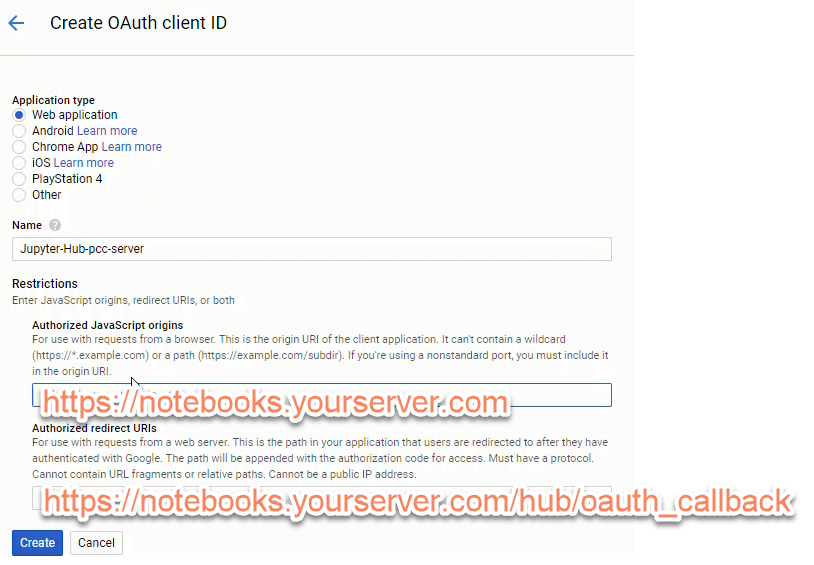
To create a set of google OAuth credentials you will need to input:
- Authorized JavaScript origins: https://notebooks.yourdomain.com
- callback url: https://notebooks.yourdomain.com/hub/oauth_callback
After creating a new set of google OAuth credentials, note the:
- client ID
- client secret
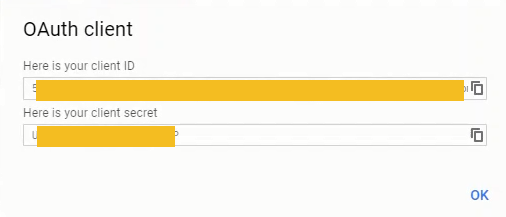
These two longs strings will be included in our revised jupyterhub configuration.
Once we get our google OAuth credentials, we need to edit jupyterhub_conf.py. Note the google OAuth credentials need to replace 'xxxxxxxxxxxxxxx'
#jupyterhub_conf.py

import os
c = get_config()
c.JupyterHub.log_level = 10
c.Spawner.cmd = '/home/peter/anaconda3/bin/jupyterhub-singleuser'

# For Google OAuth Authentication
from oauthenticator.google import LocalGoogleOAuthenticator
c.JupyterHub.authenticator_class = LocalGoogleOAuthenticator

c.LocalGoogleOAuthenticator.create_system_users = True

c.LocalGoogleOAuthenticator.hosted_domain = 'yourcollege.edu'
c.LocalGoogleOAuthenticator.login_service = 'Your College Name'

c.LocalGoogleOAuthenticator.oauth_callback_url = 'https://notebooks.yourserver.com/hub/oauth_callback'
c.LocalGoogleOAuthenticator.oauth_client_id = 'xxxxxxxxxxxxxxxxxxxxx'
c.LocalGoogleOAuthenticator.oauth_client_secret = 'xxxxxxxxxxxxxxxxxxx"
#c.JupyterHub.cookie_secret_file = '/srv/jupyterhub/jupyterhub_cookie_secret'
c.Authenticator.add_user_cmd = ['adduser', '-q', '--gecos', '""', '--disabled-password', '--force-badname']
c.Authenticator.whitelist = {'studnet.username','faculty.username'}
c.Authenticator.admin_users = {'faculty.username'}
This little line:
c.Authenticator.add_user_cmd = ['adduser', '-q', '--gecos', '""', '--disabled-password', '--force-badname']
was a real gottacha. Our college email addresses are in the form:
firstname.lastname@college.edu
So jupyterhub was trying to create users with dots . in their usernames. This doesn't work in linux. I tried creating a new user with a dot in their username and it asked me to use the --force-badname flag. So that is what we'll add to the c.Authenticator.add_user_cmd list. Otherwise the users will be able to authenticate, buy they won't get a new account on the server and they won't be able to run notebooks.
Restart jupyterhub and browse to the web address attached to the server.
$ sudo systemctl stop jupyterhub
$ sudo systemctl start jupyterhub
$ sudo systemctl status jupyterhub
# [Ctrl + c] to exit
The login window should look something like:
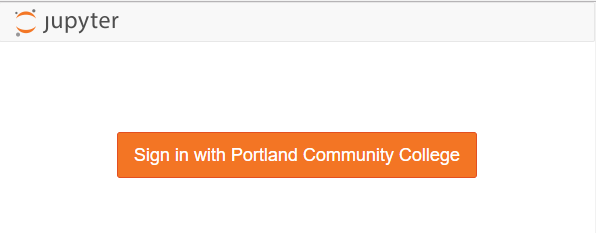
We can log in with our google user name and password (college username and password). Pretty sweet.
Summary
In this post, we set jupyterhub to run as a system service in the background which allowed us to work on the server and run jupyterhub at the same time. Then we added a github authentication system so that users could log into our Jupyter Hub server using their github usernames and passwords. Then we modified the authentication system to use google user names and passwords even if the usernames contained a dot.
Next Steps
Up next we will see if we can populate each new user's working directory tree with a couple of notebooks that will be the assignments for the quarter. We'll see if we can pull these down from github so that the assignments can be edited by instructors and viewed by the students before the quarter starts.