This is the first part of a multi-part series on how I built this site. In this first post, we'll review the development environments, Python, virtual environments, installing Python packages and set up git.
Set up the development environment
What does development environment even mean? Before I started building this site, I needed to make sure the necessary software, packages, and settings were in place. This begins with setting up a development environment. To me, a development environment is merely the software on a computer that allows me to get work done. In this case, the development environment means the tools necessary to build this site. A list of the tools and technologies are below:
- An operating system: This website was created on machines running Windows 10, MacOS and Linux (Ubuntu 16.04 LTS).
- Python: Python 3.6 (legacy Python is version 2.7)
- Anaconda: The Anaconda Prompt and the Anaconda distribution of Python
- GitHub.com and git: Four different computers were used to build the site. GitHub is the central place where the most up-to-date version of the site is kept. Git is the command-line tool used to update GitHub.com.
- Pelican: A static site generator written in Python. Pelican builds websites from posts written in markdown (.md files) and a file settings file (pelicanconf.py).
- Markdown: the posts on this website are written in markdown or .md format
- fabric and make: fabric is a Python package to automate builds and tasks. Fabric works on Windows. Make is used on MacOS and Linux to build the site and serve up a demo version of the site.
Installing Python (the Anaconda distribution)
I highly recommend installing the Anaconda distribution of Python, rather than downloading Python from Python.org. I have the Anaconda distribution of Python installed on all the computers I used to build this site:
-
Windows 10 Desktop at work
-
MacOS laptop at work
-
MacOS laptop at home
-
Linux (Ubuntu 16.04 LTS) Desktop at home.
An advantage of using the Anaconda distribution of Python (compared to "regular" Python) is that each of the four computers will have the same stable version of Python and I can keep the same Python packages installed on each machine using the conda package manager.
Download the latest Anaconda distribution of Python release at:
https://www.anaconda.com/download
The Anaconda distribution of Python comes with an up-to-date and stable version of Python (Python 3.6) and the Anaconda Prompt. The Anaconda Prompt is useful because it allows me to run shell commands on my Windows 10 machine at work. These shell commands are the same commands I run in the terminal on my MacOS or Linux boxes. The Anaconda Prompt makes creating and logging into virtual environments easy and allows me to use git on Windows 10. Follow this post to install the Anaconda on Windows 10.
Create a new virtual environment
Before downloading Pelican, we should create a new virtual environment. The same virtual environment on each of the computers I use means the same packages are installed on each machine. To create a new virtual environment, open up the Anaconda Prompt (on Windows) or a terminal (on Linux or MacOS). Let's call our new virtual environment staticsite. The conda create command creates the environment, and the -n staticsite flag adds the name.
$ conda create -n staticsite
The conda create -n staticsite command creates a new virtual environment called staticsite. Because I use four different computers to work on the site, I need to make sure the same Python packages are installed on each computer. Using a virtual environment ensures this consistency. Once the virtual environment staticsite is created, we need to activate it and start using it with the command:
$ conda activate staticsite
We should now see (staticsite) before the terminal prompt. This means we are using the (staticsite) virtual environment.
Install Pelican
Time for some fun! Installing Pelican. Pelican is a Python package that creates static websites. Static sites are websites that only have html, css, and javascript. A static site is not connected to a database, and there is no code run on the server side. The server just serves static files (html, css, javascript) to the client when the client requests them. To install Pelican, we need to install pip first. On my Linux and MacOS machines, the command line tool git is already installed. If using Windows 10, git may not be available. To keep the development environments the same when using Windows 10, you may also need conda to install git. The commands to install both pip and git are below.
(staticsite)$ conda install pip
(staticsite)$ conda install git
Once pip is installed, we can install pelican and markdown. These are two of the core packages we need to build the website. fabric3 is also installed because we'll use it to build and demo the site on Windows. bs4 is the beautiful soup package. Some of the pelican plugins installed later will depend on bs4 to function properly. Note the (staticsite) virtual environment is active when the packages are installed.
(staticsite)$ pip install pelican
(staticsite)$ pip install markdown
(staticsite)$ pip install fabric3
(staticsite)$ pip install bs4
(staticsite)$ pip install ghp-import
Create a GitHub.com account and create a new repository
While I was making the site, it became clear that I had to keep track of version control. I would make some changes to the site on my computer at work, then come home and make more changes to the site. Carrying a USB thumb drive back and forth from work to home was hard. If I forgot the thumb drive at work, (or left it at home) and then could not edit the site. Or worse, I'd modify the site in both places and try to remember which changes were made and which machine and which was the best version. Ah!
The solution is to use git and GitHub. Git is a command-line utility that assists with version control. Using git means changes made to files on one computer can be synced with the same files on another computer. GitHub.com is where the site content and settings are remotely stored and integrates easily with git.
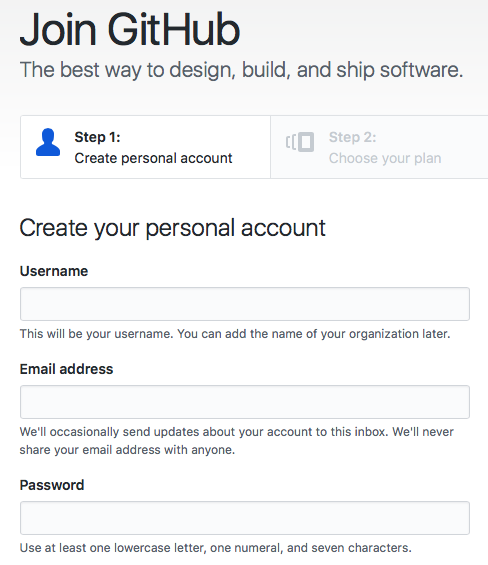
To sign up for a github.com account go here:
The account activation screen looks something like:
Once the GitHub.com account is set up, log in and create a new repository. Use the + button on the upper right-hand menu:
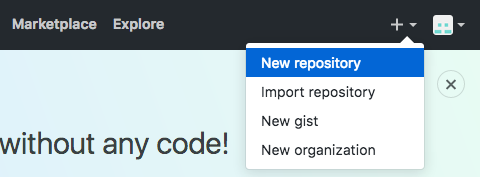
I named the new repository: staticsite and included both a README.md and a GNU General Public License v3.0. I also recommend including a .gitignore file and selecting Python among the language options.

Make a directory for the site and link it to GitHub
Once the GitHub repo (short for repository, basically a folder with files on github.com) is set up, the last step to complete the development environment is to link the remote repo on GitHub.com to the local version of the site (the version of the site on a laptop or desktop).
The local version of the site is in a folder call staticsite in the Documents folder. The staticsite folder will contain all the files used to build the site and the output files created by Pelican that are the site. The staticsite folder can be created using a terminal, or the Anaconda Prompt.
(staticsite)$ cd ~
(staticsite)$ cd Documents
(staticsite)$ mkdir staticsite
(staticsite)$ cd staticsite
Now, we can set up git to keep the contents of the local staticsite folder in sync with the remote repo on GitHub.com. The command git init creates the local repository. The command git remote add origin followed by the URL of our GitHub repo links a local folder on our computer to the remote repo on GitHub.com. Note the web address ends in .git. If you are following along and want to build your own static site, make sure to change username to your GitHub username and reponame to your GitHub repo name.
(staticsite)$ git init
(staticsite)$ git remote add origin https://github.com/username/reponame.git
Now for the git magic. On GitHub.com, we have a README.md file and a license. But the local staticsite folder on the computer is empty. So the two folders aren't in sync. To make the contents of each folder identical, we pull the files from GitHub onto the local computer. A pull "pulls" or gets the files from GitHub and copies them to the local staticsite folder.
(staticsite)$ git pull origin master
If we look in the local staticsite folder we now see the following two files:
staticsite
├── LICENSE
├── .gitignore
├── README.md
The development environment is set! On to building the site!
Now each time I work on the site, I navigate to the staticsite folder on whatever computer I am using. Before any editing, I key in the command:
$ git pull origin master
After the pull, the staticsite folder is up-to-date with the newest version of all the files on GitHub. Then I go about editing files, writing posts, changing settings, etc. After the edits, the last thing I do before shutting down the computer for the day is add all the changes to git with git add . (note there is a space between the add and the period .). Then I commit those changes locally with the line git commit -m "commit message" (note there are double quotes "commit message" used around the commit message), and finally push the changes up to github.com with git push origin master. Using this workflow, the version of the site up on GitHub.com is the same as the version of the site on my local computer.
git add .
git commit -m "commit message"
git push origin master
These commands ensure all my computers and the GitHub.com repo contain the same version of the site.
In the next post we will use the pelican-quickstart command to get the blog off the ground, write our first post and view a demo version of the site.