In this post, I am going to describe my PC build. This is the computer that I use for a lot of programming work as well as some live streams. The computer I built runs Linux (Ubuntu 20.04).
Why am I building a new Linux PC?
I use a couple of different computers to write this blog, write my book, and work on Python projects. Below is a partial list:
- Windows 10 desktop at work (back when we were were in person. Ah.. those were the days)
- Windows 10 laptop at home
- MacBook Air at home
- Linux desktop at home
The computer that is on the fritz right now is the Linux desktop in my home office. I use this computer for writing, editing, and general Python programming. In particular, I use the Linux desktop to build software, such as building custom MicroPython firmware or building Python from source. It is useful to have a Linux system for these sorts of tasks. I have also streamed from this Linux desktop PC as it is the only PC in the house that is connected using hard-wired ethernet.
Parts List
Below is a table of the parts used in the PC build. Please note that the links below are Amazon Affiliate links. If you purchase one of these items, I receive a small commission. There is no additional cost to you.
- Processor: AMD Ryzen 2400G (4 Core 8 Thread) APU
- Cooler: Stock AMD Cooler the comes with the 2400G
- Motherboard: MSI B450I Mini-ITX Gaming Plus AC
- Storage: Crucial P1 1TB M.2 NVMe SSD
- Ram: Corsair Vengeance DDR4 3000 MHz 16GB (2x8GB)
- Power Supply: Corsair CX Series 450 Watt 80 Plus Bronze Semi-Modular Power Supply
- Case: SilverStone SST-SG13B-V2 Mini-ITX Computer Case with Mesh Front Panel
- Fan: Noctua NF-P14s redux-1500 PWM Cooling Fan
The following is an overview of each component.
AMD Ryzen 5 2400G

The AMD Ryzen 5 2400G is an integrated CPU and GPU in one package (called an APU). I like this processor for the price, the integrated GPU, thread count, and speed. My old processor was a couple of generations old Intel Core i3 that only had two cores. The Ryzen 5 2400G is a nice step up. I chose a Ryzen 5 APU because I did not want to buy a stand-alone graphics card. This Linux PC will not be used for gaming or heavy video editing, so I don't need a lot of graphics power. What I do want is a simple build (fewer components), reasonably fast, and low cost. The Ryzen 5 APU fits these requirements nicely. I will only need one CPU cooler and one CPU power supply cable to hook the processor up to the motherboard. Fewer fans, less cable management, fewer components in a small case. I think the Ryzen 5 2400G is a win.
MSI B450I Mini-ITX Gaming Plus AC

The motherboard I choose is the MSI B450I Mini-ITX Gaming Plus AC. This motherboard has an AM4 CPU socket for the Ryzen 5 processor I chose. I like the newer B450 chipset, and I hopefully won't need to use an older Ryzen first-gen processor to get the system started, which might be required if an older motherboard was employed. The MSI B450I Mini-ITX motherboard has an M.2 slot for an SSD and an HDMI port for monitor output. Since I'm using the Ryzen 5 2400G (without a discrete graphics card), I needed to make sure that the motherboard has an AM4 socket and has an HDMI out. This motherboard fits the bill.
Crucial P1 1TB M.2 NVMe SSD

I picked the Crucial P1 1TB M.2 NVMe SSD for this Linux PC build. The SSD was a component I had trouble deciding on. My old system had a 60GB SSD and a 1TB spinning rust hard drive. This was a cheap way to equip the system. The problem was the system had two SATA data cables, and two SATA power cables, plus two drives were mounted in the case.
I want to keep this build simple and clutter-free. M.2 drives plug directly into the motherboard and do not require any cables. The Crucial P1 drive I selected is 80 mm long, which is the most common M.2 length. The MSI motherboard I picked has one M.2 slot on the back that the drive plugs into. I choose 1GB of capacity.
I just feel like you always need more storage.
The old system started out with only a 60GB SSD about 8 years ago. Then I added a 1TB spinning hard disk because I ran out of storage space. I want this PC build to last at least 5 years, so I splurged on extra SSD capacity. I also went with a drive that runs the super fast NMV3e PCIe communication standard. An NVMe SSD drive probably won't have any practical performance benefits compared to a SATA SSD for the things I use the new PC for. I guess I just like to know that I have fast storage. Plus, long boot times bug me.
Corsair Vengeance DDR4 3000 MHz 16GB (2x8GB)

I choose 16 GB of DDR4 RAM for my new system. The Corsair Vengeance DDR4 3000 MHz kit I bought includes 2 x 8 GB DIMMs. I don't know if my system will be able to take advantage of the 3000 MHz maximum clock speed. It's simply 16 GB of standard DDR4 memory.
Power Supply

The power supply I went with this the Corsair CX Series 450 Watt 80 Plus Bronze Semi-Modular Power Supply.
For this build, I am only going to need a 24-pin cable for the motherboard power and supplemental CPU power. The power supply I bought is semi-modular which means some of the cables are permanently attached and some of the cables are removable. The cables I need for the build are cables that are permanently attached. I don't need any of the detachable cables. This means that I save a little money compared to a fully modular power supply (all detachable cables), but still get the benefits of as few cables as possible.
Case

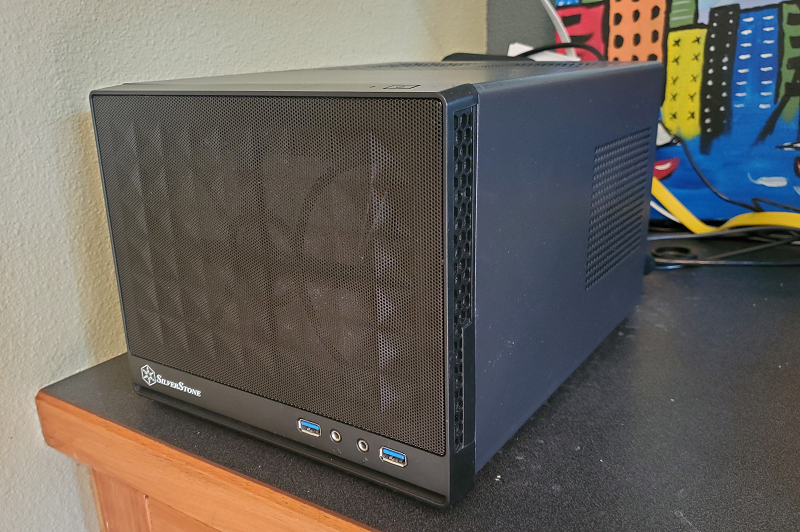
I put all the components inside the Silverstone SG13B-V2 Mini ITX case. This case accepts mini ITX motherboards and can accommodate standard ATX power supplies (as well as smaller SFX power supplies). It isn't fancy, but it is inexpensive and gets the job done.
Fan

I bought a fan for the SilverStone case because it doesn't come with one. I mounted the fan in the front of the case. One thing I think I would do differently is to buy a 120 mm fan (which is a more common size), rather than the larger 140 mmm fan I bought (which is a less common size). The Silverstone case fits a 120 mm fan just fine and the 140 mm fan mount only has three screw locations.
That's all the parts. Below is a description of the build and installation process.
Build
I built the PC in a couple of steps. First I built the PC on top of the motherboard box outside of the case to make sure all the components worked together.
Before I started building, I plugged in the power supply (power off) and attached an ESD wrist strap to the grounded power supply case with the alligator clip. I don't know if this is necessary, but I have an ESD wrist strap, so I thought I'd use it.
Mount the CPU on the motherboard
Next, I installed the CPU on the motherboard. Make sure to line up the little triangle on the corner of the CPU with the little corner on the CPU socket on the motherboard. You don't need to push the processor into the socket. The little lever on the side of the socket seats the CPU with the right amount of pressure.
Mount the RAM on the motherboard
Next, I attached the RAM to the motherboard. There are two clips on the side of the RAM slots of the motherboard. Then I pushed the RAM in until it "clicked". The RAM only fits into the RAM slots in one orientation.
Add the CPU cooler
The Ryzen 5 2400G CPU comes with a CPU cooler included in the box. The included cooler has thermal paste pre-applied, so no thermal paste needs to be added to the top of the processor before the cooler is mounted. There are two plastic brackets, one on each side of the processor that need to be removed from the motherboard before the CPU cooler is attached. When the plastic brackets come off, the plate on the back of the motherboard falls off. I've heard you can hold the plate on the back of the motherboard with painter's tape. I just had to re-align the metal backplate after I took the plastic brackets off.
I put the cooler on top of the processor and just seated the screws before I tightened it down. I used a cross pattern to tighten each screw about a turn at a time until the cooler was screwed down tight.
Attach the M.2 SSD drive
Next, I flipped the motherboard over and attached the M.2 SSD. The baggie of screw that came with the motherboard contained a tiny M.2 standoff and a tiny M.2 screw. The standoff goes "below" the M.2 drive and the little screw goes "above" the M.2 drive. I slid the drive into the M.2 slot at about a 30-degree angle, then pushed it down till hit was horizontal and tightened down the end of the M.2 SSD to the standoff with the tiny screw.
When I first got the motherboard out of the box I couldn't figure out where an M.2 drive goes. There didn't seem to be any on the top of the motherboard. The trick was the M.2 drive mount is on the back of the motherboard.
Attach the motherboard power and CPU power.
Finally, I attached the big 24-pin motherboard power cable from the power supply and the 6-pin supplemental CPU power cable from the power supply to the motherboard. I don't need any other power cables because the SSD is powered by the M.2 slot and the "graphics card" is integrated into the CPU.
All these steps were accomplished outside the case.
Start-Up
After the system was fully assembled, I plugged a monitor into the HDMI port and plugged a mouse and keyboard into USB ports. I also plugged in an ethernet cable. I could use the motherboard's onboard WiFi, but the wired ethernet is faster and won't require any setup. I started the system for the first time by shorting the POWER pins on the motherboard with a screwdriver. After the power turned on, I hit the DELETE key rapidly to bring up the motherboard BIOS.
Update the motherboard BIOS
I downloaded the latest firmware for my motherboard from the MSI website. The download from MSI was a zip file, and I unzipped it onto a USB thumb drive. Within the motherboard BIOS, there is the option to update the BIOS firmware. I selected that option and my USB thumb drive that contained the firmware file. Then the system re-started and I went into the BIOS again.
Check the system specs in the BIOS
Next, I checked my new system's specs in the BIOS. I wanted to make sure the CPU and SSD were recognized. I didn't overclock the CPU or the RAM. I would like to see if the XMP profile for the RAM will run on my setup. For the first start-up, I left the RAM at stock speed.
Install Linux
With the system still outside the case and the motherboard sitting on top of the motherboard box, I installed Ubuntu 20.04 from a USB drive.
From the BIOS, I powered down the system and inserted a thumb drive with the Linux (Ubuntu 20.04) .iso image into the motherboard. I selected the newest version of Ubuntu. I hope that the newest version of Ubuntu will play nice with my newish Ryzen 5 APU.
When I turned the power back on, I pushed F11 over and over to bring up the boot menu. I selected the USB thumb drive with the Linux .iso image on it and started the system for the first time.
The Ubuntu installer takes a while to complete and downloads a bunch of stuff during the installation. The total install time was around 20 minutes.
Try it out!
After Ubuntu was set up, I tried the new system out. It worked great! Firefox opens quickly and YouTube videos stream no problem. I also entered those standard Linux command-line update commands:
sudo apt-get update
sudo apt-get upgrade
Put the system in the case
Finally, I put my new system in the case. The motherboard gets screwed into the four motherboard standoffs at the bottom of the case. A problem I ran into is that the AMD Wraith CPU cooler bumps into a hard drive caddy on my case. I took the hard drive caddy off to provide room for the AMD CPU cooler.
I love the fact the system only contains one fan and two power cables. The inside of the case is clean and uncluttered. I initially messed up how I hooked up the power, reset buttons to the motherboard header. When I first pushed the power button on the case, nothing happened. It turned out I just messed up the way these leads were supposed to be connected.
Summary
In this post, I reviewed how I built my Linux Desktop PC from individual components. The build was relatively free of hiccups. The hardest part was removing the hard drive caddy in the case so that the CPU cooler would fit. I do have some upgrades in mind for this system... A fancier case would be nice. If I end up overclocking the system, a new CPU cooler might be in order. And there is always the possibility to add a discrete graphics card, more RAM, and a more powerful CPU.